こんにちは。IAFです。
今回は、前回までで準備したDialogue System for Unityとjson.netを使って、
実際に会話システムを作ります。
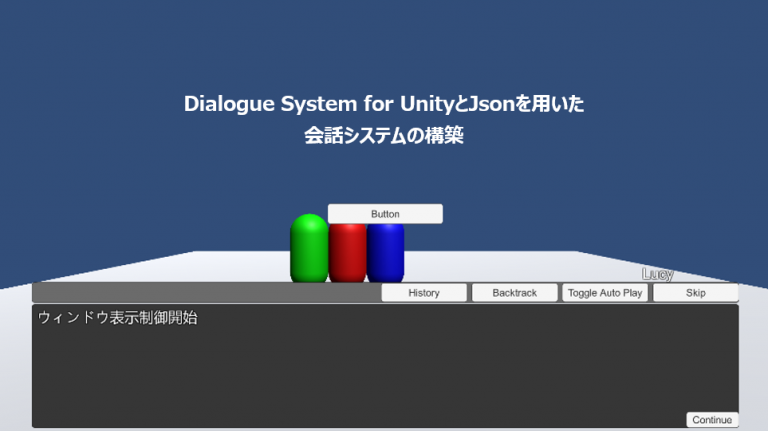
完成系はこちら。
画面中央のボタンをタップすると会話がスタートします。
また、会話終了後もう一度タップすると新たに会話がスタートします。
Dialogue System for Unityの準備はこちら
Json.netの準備はこちら
前提条件
・Unity 2020.3.32f1
・Dialogue System for Unity 2.2.26
・VisualNovelFramework 2.0.9a
・Json.net 13.0.1
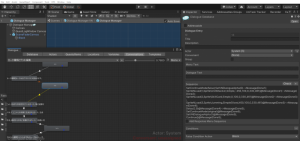
Dialogue System for Unityのシーケンスについて
※製作完了ゲーム”Twin Deck”のマニュアル部分より抜粋。
画像表示や移動のためそこそこDialogue System for Unityの「シーケンス」を多用していました。
こんな感じ。

SetContinueMode(false);
SetVNDialogueAlpha(0)->Message(Done1);
SpriteNLoad(1,Sprite\UnitAttacker,Simple,-450,100,0,330,461)@Message(Done1)->Message(Done2);
SpriteNLoad(2,Sprite\SkillCard,Simple,0,100,0,330,461)@Message(Done2)->Message(Done3);
SpriteNLoad(3,Sprite\Jumming,SimpleSliced,450,100,0,330,461)@Message(Done3)->Message(Done4);
Delay(2.0)@Message(Done4)->Message(Done5);
SetContinueMode(original)@Message(Done5);
SetVNDialogueAlpha(1)@Message(Done5);
Continue()@Message(Done5);
このうち、SetVNDialogueAlpha、SpriteNLoadは自作シーケンス。
なにをしているかというと、
会話ウィンドウを消して画像3枚表示して戻す
これだけ。
それなのに、シーケンシャルに実行するためにメッセージ発行とメッセージ待ちを多用する羽目になっているので多く見える。
①タップで次に進むモードの一時解除
②文字表示ウィンドウの透明化。完了時Done1を発行
③Done1が発行されたら画像1を読み込んで表示。完了時Done2を発行
④Done2が発行されたら画像2を読み込んで表示。完了時Done3を発行
⑤Done3が発行されたら画像3を読み込んで表示。完了時Done4を発行
⑥Done4が発行されたら2秒待って完了時Done5を発行
⑦⑧⑨Done5が発行されたらタップで先に進むモードに戻し、文字表示ウィンドウの透明化を解除し、タップをシミュレートし次に遷移
※〇内番号はソースコードの行と対応してます。
なお、Message()の中身の名前はなんでも可。但し被ると正常動作に支障ありなので注意。
分量が増えた原因はほぼ前シーケンスの完了待ちですが、デフォルトのシステムを使うとこうなってしまうのかな?と思います。
最小限の構成
Dialogue Manager VNの設定(タグ付け)
頻度よく操作する画面はFindGameObjectWithTagで検索したい(その方が高速だから)。
そのためTagを設定します。
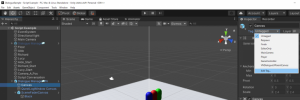
シーン上のDialogue Manager VNのインスタンスに対しタグ付けをします。

InspectorのAdd Tag…より、”VNDialogueUIParentCanvas”という名前のタグを追加、設定。
※後からタグを消すのは大変な場合があるので、タグの命名は慎重に行いましょう
ScriptConversationクラスの書き換え
Assets\Dialogue System Examples\Script Example\ScriptConversation.csを以下のように書き換え
using UnityEngine;
using PixelCrushers.DialogueSystem;
using System.Collections.Generic;
using Newtonsoft.Json;
using System.Linq;

public class ScriptConversation : MonoBehaviour
{
    // Notes:
    // Settings changed on Dialogue Manager prefab:
    // - Subtitle Settings > Show PC Subtitles During Line ticked.
    // - Input Settings > Always Force Response Menu unticked.

    public void StartConversationButton_Clicked()
    {
        // Create database:
        var database = ScriptableObject.CreateInstance();

        // Create a template, which provides helper methods for creating database content:
        var template = Template.FromDefault();

        // Our actors defined in dialogue database:
        int aldoID = 1;
        int richardID = 2;
        int lucyID = 3;

        // Create a conversation: [ID 0=START] --> [ID 1=Hello]
        int conversationID = 1;
        var conversationTitle = "My Conversation";
        var conversation = template.CreateConversation(conversationID, conversationTitle);
        conversation.ActorID = aldoID;
        conversation.ConversantID = richardID;
        database.conversations.Add(conversation);

        // START node: (Every conversation starts with a START node with ID 0)
        int entryID = 0;
        var node = template.CreateDialogueEntry(entryID++, conversation.id, "START");
        node.Sequence = "None()"; // START node usually shouldn't play a sequence.
        conversation.dialogueEntries.Add(node);

        // Node 1: 何も表示せずContinue()だけ実行。これが無いと読込に失敗する模様??
        var previousNode = node;
        node = template.CreateDialogueEntry(entryID++, conversation.id, string.Empty);
        node.Sequence = "Continue();";
        conversation.dialogueEntries.Add(node);
        // Link from START:
        var link = new Link(conversation.id, previousNode.id, conversation.id, node.id);
        previousNode.outgoingLinks.Add(link);


        // Add it to the runtime environment and play it:
        DialogueManager.AddDatabase(database);
        DialogueManager.StartConversation(conversationTitle);

        // 会話開始後でもJsonの読込と会話シーンの遷移状態は生成できる
        var jsonStr = Resources.Load("scenario_test2").ToString();
        var jsons = JsonConvert.DeserializeObject<Dictionary<string, string>[]>(jsonStr);

        jsons.ToList().ForEach(x =>
        {
            previousNode = node;
            node = template.CreateDialogueEntry(entryID++, conversation.id, string.Empty);
            node.ActorID = lucyID; // Lucy speaks this line.
            node.ConversantID = richardID;
            if (x.ContainsKey("Text"))
            {
                node.DialogueText = x["Text"];
            }
            if (x.ContainsKey("Seq"))
            {
                node.Sequence = x["Seq"] + ";";
            }
            conversation.dialogueEntries.Add(node);
            // Link from previous node:
            link = new Link(conversation.id, previousNode.id, conversation.id, node.id);
            previousNode.outgoingLinks.Add(link);
        });
    }
}
会話開始用ボタンの製作・Canvasへの設置
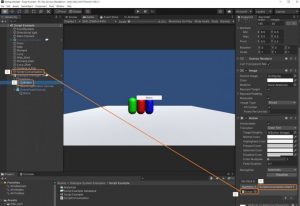
シーン内Dialogue Manager VN\Canvasを右クリックし、
UI->Buttonでボタンを追加
ボタンのOnClick()イベントにStartConversationButton_Clicked()を登録

Jsonファイルの作成
以下のように記述します。
scenario_test2.json
[
  {
    "Text":"おはようございます"
  },
  {
    "Text":"ウィンドウ表示制御開始"
  },
  {
    "Seq":"SetContinueMode(false)"
  },
  {
    "Seq":"SetVNDialogueAlpha(0)"
  },
  {
    "Seq":"Delay(2.0)"
  },
  {
    "Seq":"SetVNDialogueAlpha(1)"
  },
  {
    "Seq":"SetContinueMode(true)"
  },
  {
    "Text":"ウィンドウ表示制御完了"
  }
]
実行結果
備考
自作シーケンスについて
Dialogue System for Unityのマニュアルに、シーケンスの追加方法が書かれています。
https://www.pixelcrushers.com/dialogue_system/manual2x/html/cutscene_sequences.html
の一番下方。
例については以下のようなシーケンスを追加しました。(プロジェクト内のどこに保存してもOK。但し命名規則あり)
SequencerCommandSetVNDialogueAlpha.cs
using UnityEngine;
using PixelCrushers.DialogueSystem.SequencerCommands;

namespace PixelCrushers.DialogueSystem.VisualNovelFramework
{
    /// 0 : alpha値
    public class SequencerCommandSetVNDialogueAlpha : SequencerCommand
    {
        private void Awake()
        {
            var dialogueUI = GameObject.FindGameObjectWithTag("VNDialogueUIParentCanvas");
            dialogueUI.GetComponent().alpha = float.Parse(GetParameter(0));
            Stop();
        }
    }
}
以上、お疲れさまでした。
基本部分を作ったので次はこれらを使ってゲームのプロトタイプ製作を目指す…かな?


